How to create custom workflows
This guide shows you how to create a custom workflow entry that connects existing NOMAD entries and archive sections as inputs, tasks, and outputs. It covers entries created from supported files or schemas, references within and across projects, and nested workflows. The resulting entry contains an interactive workflow graph for inspecting the connections and navigating to the referenced data.
To begin, you need a project to which you can add files. The entries and data that the workflow connects can already exist, or you can add their files together with the workflow file, as in the downloadable examples in this guide.
The simulation examples in this guide have been tested on
NOMAD Central.
They can also be reproduced on a NOMAD Oasis with the
electronic-parsers plugin
installed.
Note
When trying these examples on NOMAD Central, keep test projects unpublished. Publishing is permanent and cannot be undone.
Recommended preparation
- How-to guides > ... > Create and publish Projects
- Explanation > From files to data
- Explanation > Data structure
Further resources
Overview
NOMAD workflows connect archive sections through inputs, tasks, and outputs. For supported data, NOMAD may create a workflow automatically during Explanation > Processing. A custom workflow entry lets you define these connections when the workflow is not created automatically.
The examples in this guide use supported simulation files to provide reproducible task entries. Their scientific methods are not relevant to the workflow patterns demonstrated here.
Simple workflows with supported tasks
Start with a workflow containing one task, one input, and one output:
graph LR;
    A((Input structure)) --> B[DFT];
    B[DFT] --> C([Output calculation]);
The task is represented by dft.xml, the mainfile of a density functional
theory (DFT) calculation performed with VASP, an electronic-structure
simulation code. In this example, the VASP parser provided by the
electronic-parsers plugin
creates an entry with a workflow2 section representing the single-point
calculation. This behavior is specific to the parser and is not a general
feature of all parser-supported mainfiles.
Open the parser-generated entry and select CONNECTIVITY to view its workflow graph:
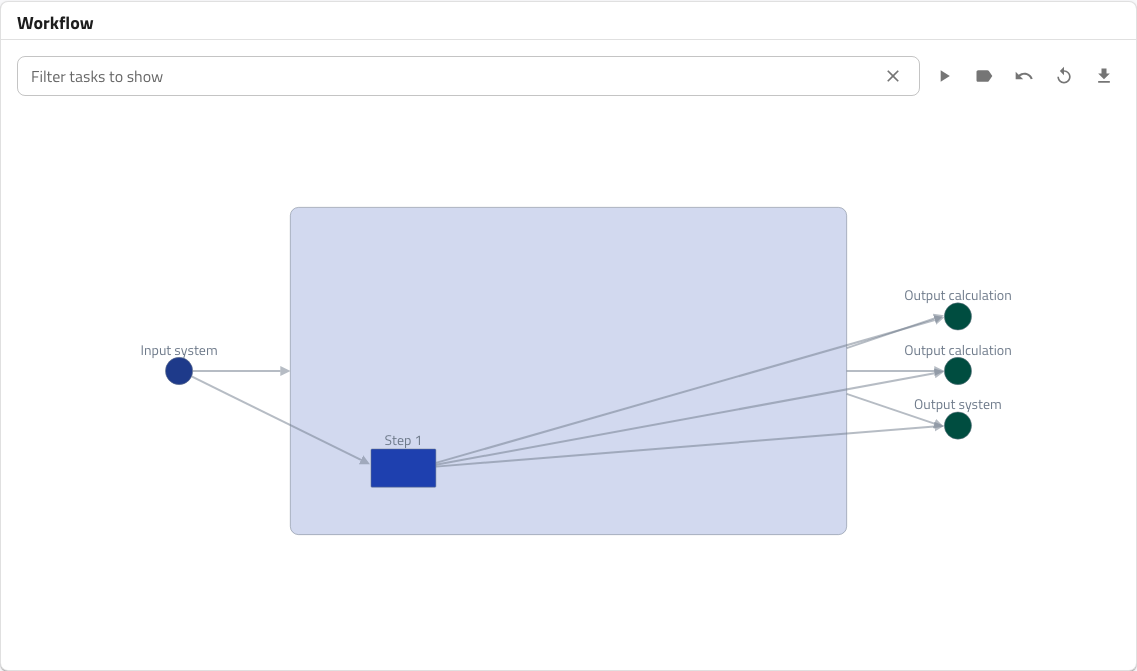
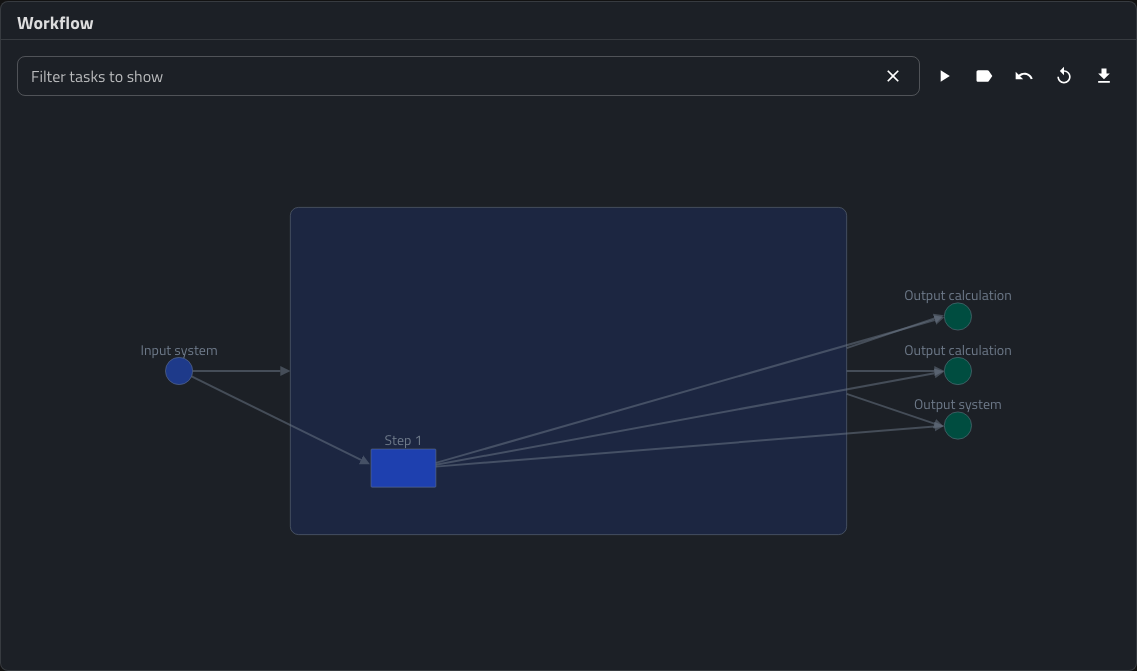
The parser normalizer exposes three global output links in this graph. The two nodes labeled Output calculation refer to the same final calculation section, while Output system refers to the final system section. They do not represent three separate calculations. The duplicate calculation link is a normalizer artifact rather than a distinct result.
For simplicity, the custom workflow below does not reproduce this
parser-specific output set. Instead, it recreates the central input-task-output
path of the SinglePoint workflow graph in a separate custom workflow entry
using YAML, as described in
How-to guides > ... > Populate data.
The custom workflow references the parser-generated workflow2 section
as its task and explicitly uses the same system and final calculation sections
as its input and output.
Create the custom workflow YAML file
To define the initial workflow, create a file dft.workflow.archive.yaml with the following content:
workflow2:
  name: DFT SinglePoint
  inputs:
    - name: Input system
      section: '../upload/archive/mainfile/dft.xml#/run/0/system/-1'
  outputs:
    - name: Output calculation
      section: '../upload/archive/mainfile/dft.xml#/run/0/calculation/-1'
  tasks:
    - m_def: nomad.datamodel.metainfo.workflow.TaskReference
      task: '../upload/archive/mainfile/dft.xml#/workflow2'
      name: DFT
      inputs:
        - name: Input structure
          section: '../upload/archive/mainfile/dft.xml#/run/0/system/-1'
      outputs:
        - name: Output calculation
          section: '../upload/archive/mainfile/dft.xml#/run/0/calculation/-1'
The repeated section references create the graph edges. The workflow input
and task input both reference the same system section, while the task output
and workflow output both reference the same calculation section. More
generally, NOMAD connects nodes whose matching references point to the same
archive section. Between two tasks, the source task's output and the target
task's input must match in this way.
Important
A workflow file created from YAML must have a filename ending in
.archive.yaml.
This file follows NOMAD's schemas for
Explanation > Data structure > Archives
and
Explanation > Workflows > The built-in abstract workflow schema.
The workflow2 section has three possible subsections: inputs, outputs, and
tasks:
inputs: a list of references to the global inputs of the workflow, with name and section attributes. section corresponds to a path for linking to the relevant archive section. In this case, the relative section path is run[0].system[-1], linked to the entry defined by the mainfile dft.xml. The prefix is discussed under Archive path specification.
outputs: identical to the inputs list, representing the global outputs of the workflow, with the relative section path run[0].calculation[-1] in this case.
tasks: a list of references to the tasks/steps of the workflow. Each task
in this example contains m_def, task, name, inputs, and outputs
attributes. name supplies the task label shown in the workflow graph.
inputs/outputs are task-specific versions of the lists defined above.
m_def defines the type of task according to NOMAD's Metainfo schema, in this case a TaskReference to the archive workflow2 section. The use of TaskReference is clarified under Nested workflows > In multiple entries.
task is the path for linking to the relevant archive section, analogous to the section attribute for inputs/outputs. However, this path must reference a task, which in all practical cases corresponds to a workflow2 section.
Archive path specification
In general, an archive reference can be represented as
<prefix>/<entry_locator>#/<relative_archive_path>:
<relative_archive_path>identifies the section within the target entry. Open the entry's ARCHIVE page and navigate to the section you want to reference.- Entry in the same project:
<prefix>is../upload/archive/mainfile<entry_locator>is the path to the entry's mainfile from the project root
- Entry in another project:
<prefix>is../uploads/<upload_id>/archive<entry_locator>is<entry_id>
In archive-reference paths, upload and uploads are backend terms for projects, and upload_id is equivalent to the project ID.
For the general principles and supported forms, see How-to guides > ... > Link data with references and Reference > Schema language > Reference forms.
Download and reproduce the example
The compressed file contains:
To reproduce the example in a new project:
- Open PROJECTS and select NEW PROJECT.
- Enter a project name, select ADD FILES, and add
simple_workflow.zip. - Select CREATE.
-
After processing completes, open ENTRIES and confirm that NOMAD created two successfully processed entries:
- a single-point entry with the mainfile
dft.xml; and - a custom workflow entry with the mainfile
dft.workflow.archive.yaml.
- a single-point entry with the mainfile
-
Open the custom workflow entry. Its Overview page contains this graph:
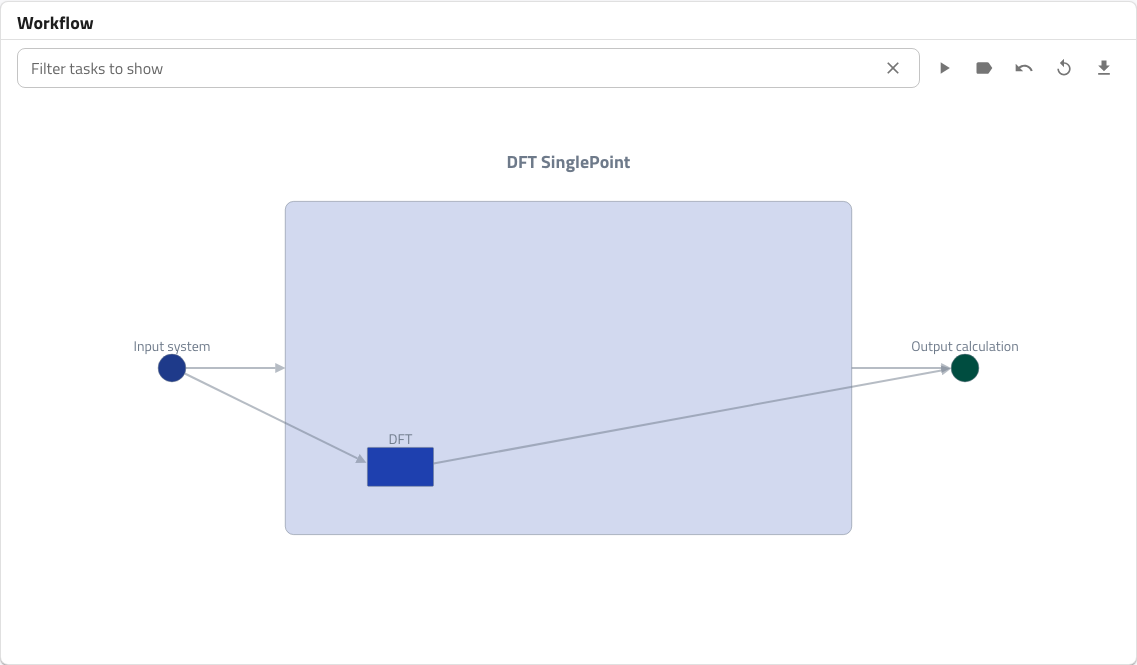
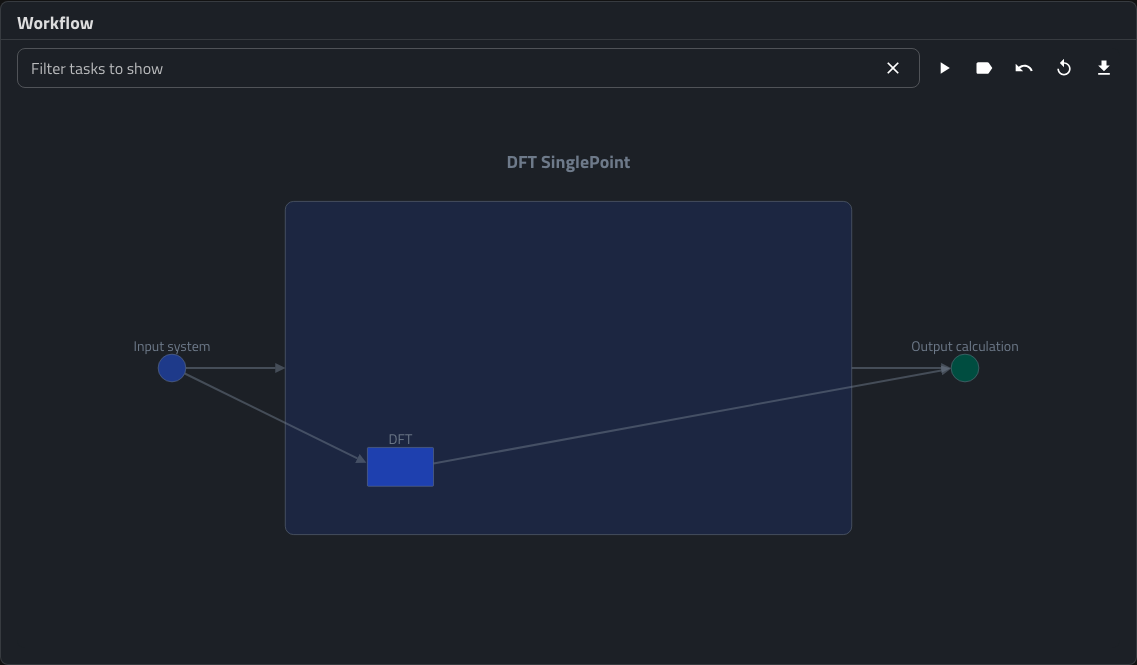
This graph has one output node because the task output and global workflow output reference the same calculation section. The visualizer represents this shared section as one connected output node.
Add the methodology as a workflow input
You can also represent the calculation's methodological parameters as an
input. They are stored at run[0].method[-1] in the dft.xml entry. Add
the following item to both workflow2.inputs and
workflow2.tasks[0].inputs in dft.workflow.archive.yaml:
Reprocessing the updated file adds another input node to the custom workflow graph.
Reference an entry in another project
A workflow entry can reference tasks or data in another project on the same
NOMAD deployment. For these references, use
../uploads/<upload_id>/archive/<entry_id>#/<relative_archive_path> as
described under Archive path specification.
To find the required identifiers:
- Open the target entry, select ARCHIVE, and navigate to
metadata>upload_id. Copy this value and use it as<upload_id>. Alternatively, open the target project, select SETTINGS, and copy its Project ID, which is the same identifier. - In the target entry's ARCHIVE, navigate to
metadata>entry_id. Copy this value and use it as<entry_id>. Alternatively, copy the value immediately after/entries/in the entry's URL.
For example, the dft.workflow.archive.yaml file from the previous section can
be adapted as follows:
Reference the dft.xml entry from another project
workflow2:
  name: DFT SinglePoint
  inputs:
    - name: Input system
      section: '../uploads/<upload_id>/archive/<entry_id>#/run/0/system/-1'
  outputs:
    - name: Output calculation
      section: '../uploads/<upload_id>/archive/<entry_id>#/run/0/calculation/-1'
  tasks:
    - m_def: nomad.datamodel.metainfo.workflow.TaskReference
      task: '../uploads/<upload_id>/archive/<entry_id>#/workflow2'
      name: DFT
      inputs:
        - name: Input structure
          section: '../uploads/<upload_id>/archive/<entry_id>#/run/0/system/-1'
      outputs:
        - name: Output calculation
          section: '../uploads/<upload_id>/archive/<entry_id>#/run/0/calculation/-1'
To test the cross-project references:
- Create a file named
dft-cross-project.workflow.archive.yamlusing the contents shown above. Replace<upload_id>and<entry_id>with the identifiers for the project and entry containingdft.xml. - Create another project and add only the new
dft-cross-project.workflow.archive.yamlfile. - After processing completes, open the resulting workflow entry and confirm that its graph contains the referenced DFT task from the original project.
Nested workflows
Nested, or hierarchical, workflows contain task nodes that can themselves be
represented as directed graphs. The
Explanation > Workflows > The built-in abstract workflow schema
supports this pattern through the inheritance relationship from Task to
Workflow.
In multiple entries
The most common way to construct a nested workflow is by creating a separate
entry for each sub-workflow. Each sub-workflow archive then contains a populated
workflow2 section. To use it as a task, reference that section directly with
task: <prefix>/<entry_locator>#/workflow2, following the forms under
Archive path specification.
Important
When task references a workflow2 section in another entry, define the
sub-workflow task as a TaskReference by setting
m_def: nomad.datamodel.metainfo.workflow.TaskReference. The default type,
nomad.datamodel.metainfo.workflow.Task, can contain a Task directly but
cannot reference one in another entry. See
Explanation > Workflows > The built-in abstract workflow schema.
We have already seen this case in Simple Workflows with Supported Tasks. On NOMAD Central, the installed simulation parsers add a workflow representation to recognized simulation entries, including single-step calculations. A workflow that references these parser-generated simulation entries as tasks is therefore a nested workflow. Other deployments may provide different simulation parsers and workflow metadata.
In a single entry
Since a Workflow instance is also a Task instance due to inheritance, you
can nest workflows directly within a single entry. The following computational
workflow illustrates this pattern:
graph LR;
    A2((Input structure)) --> B2[DFT];
    B2 --> C2[TB];
    C2 --> D21[DMFT at T1];
    C2 --> D22[DMFT at T2];

    subgraph DMFT
        D21;
        D22;
    end

    D21 --> E21([Output DMFT at T1 calculation])
    D22 --> E22([Output DMFT at T2 calculation])
This workflow contains a series of electronic-structure calculations: a density functional theory (DFT) calculation and a tight-binding (TB) calculation performed in series, followed by two dynamical mean-field theory (DMFT) calculations performed in parallel at different temperatures. The DMFT workflow task is represented as a sub-workflow.
The mainfiles for these calculations are organized in the following file structure, stored with nested_workflow_one-entry.zip:
.
├── DFT
│   └── dft.xml
├── TB
│   ├── tb.wout
│   └── ...extra auxiliary files
├── DMFT
    ├── T1
    │    └── dmft_t1.hdf5
    └── T2
        └── dmft_t2.hdf5
The following snippets construct
nested_workflow_one-entry.archive.yaml in parts for clarity.
The overall workflow2 section and global workflow inputs:
workflow2:
  name: DFT+TB+DMFT
  inputs:
    - name: Input structure
      section: '../upload/archive/mainfile/DFT/dft.xml#/run/0/system/-1'
The global workflow outputs outputs:
  outputs:
    - name: Output DMFT at T1 calculation
      section: '../upload/archive/mainfile/DMFT/T1/dmft_t1.hdf5#/run/0/calculation/-1'
    - name: Output DMFT at T2 calculation
      section: '../upload/archive/mainfile/DMFT/T2/dmft_t2.hdf5#/run/0/calculation/-1'
The workflow tasks:
  tasks:
    - m_def: nomad.datamodel.metainfo.workflow.TaskReference
      task: '../upload/archive/mainfile/DFT/dft.xml#/workflow2'
      name: DFT
      inputs:
        - name: Input structure
          section: '../upload/archive/mainfile/DFT/dft.xml#/run/0/system/-1'
      outputs:
        - name: Output DFT calculation
          section: '../upload/archive/mainfile/DFT/dft.xml#/run/0/calculation/-1'
    - m_def: nomad.datamodel.metainfo.workflow.TaskReference
      task: '../upload/archive/mainfile/TB/tb.wout#/workflow2'
      name: TB
      inputs:
        - name: Input DFT calculation
          section: '../upload/archive/mainfile/DFT/dft.xml#/run/0/calculation/-1'
      outputs:
        - name: Output TB calculation
          section: '../upload/archive/mainfile/TB/tb.wout#/run/0/calculation/-1'
    - m_def: nomad.datamodel.metainfo.workflow.Workflow
      name: DMFT
      inputs:
        - name: input TB calculation
          section: '../upload/archive/mainfile/TB/tb.wout#/run/0/calculation/-1'
      outputs:
        - name: Output DMFT at T1 calculation
          section: '../upload/archive/mainfile/DMFT/T1/dmft_t1.hdf5#/run/0/calculation/-1'
        - name: Output DMFT at T2 calculation
          section: '../upload/archive/mainfile/DMFT/T2/dmft_t2.hdf5#/run/0/calculation/-1'
      tasks:
        - m_def: nomad.datamodel.metainfo.workflow.TaskReference
          task: '../upload/archive/mainfile/DMFT/T1/dmft_t1.hdf5#/workflow2'
          name: DMFT at T1
          inputs:
            - name: Input TB calculation
              section: '../upload/archive/mainfile/TB/tb.wout#/run/0/calculation/-1'
          outputs:
            - name: Output DMFT at T1 calculation
              section: '../upload/archive/mainfile/DMFT/T1/dmft_t1.hdf5#/run/0/calculation/-1'
        - m_def: nomad.datamodel.metainfo.workflow.TaskReference
          task: '../upload/archive/mainfile/DMFT/T2/dmft_t2.hdf5#/workflow2'
          name: DMFT at T2
          inputs:
            - name: Input TB calculation
              section: '../upload/archive/mainfile/TB/tb.wout#/run/0/calculation/-1'
          outputs:
            - name: Output DMFT at T2 calculation
              section: '../upload/archive/mainfile/DMFT/T2/dmft_t2.hdf5#/run/0/calculation/-1'
Unlike the pattern under
Nested workflows > In multiple entries, which uses a
TaskReference, this example defines the DMFT task directly as a Workflow.
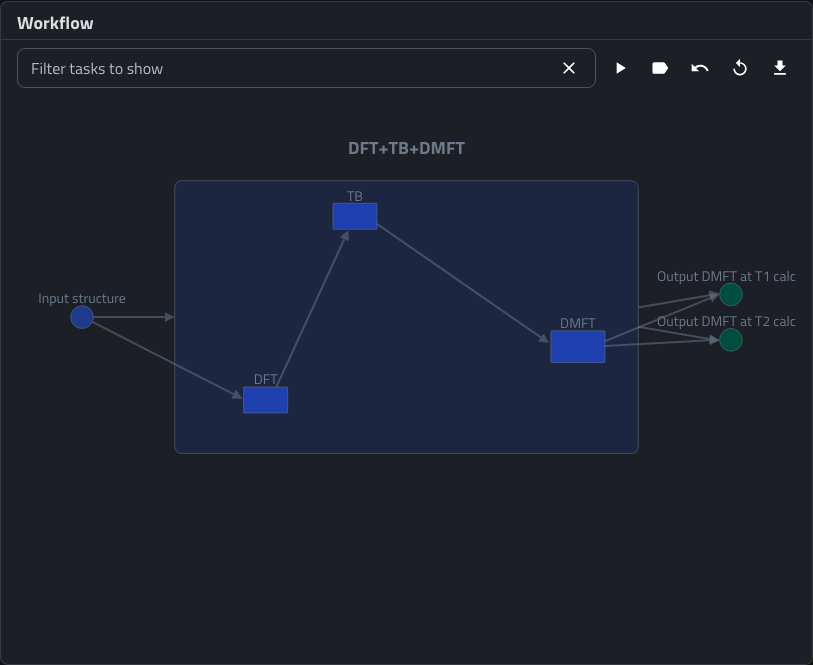
When added to a project with the example data, this workflow file produces an
entry whose Overview page initially shows the complete DFT+TB+DMFT
workflow:
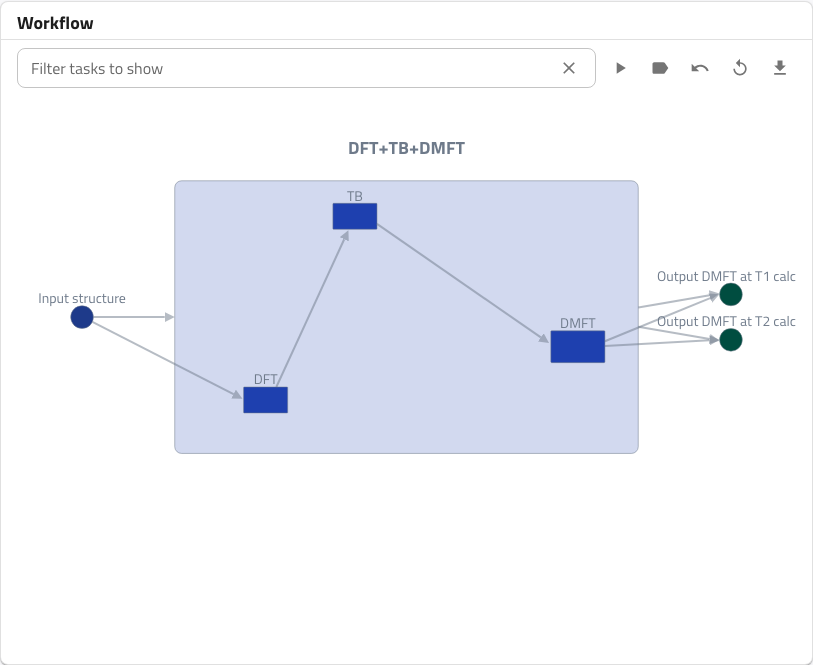
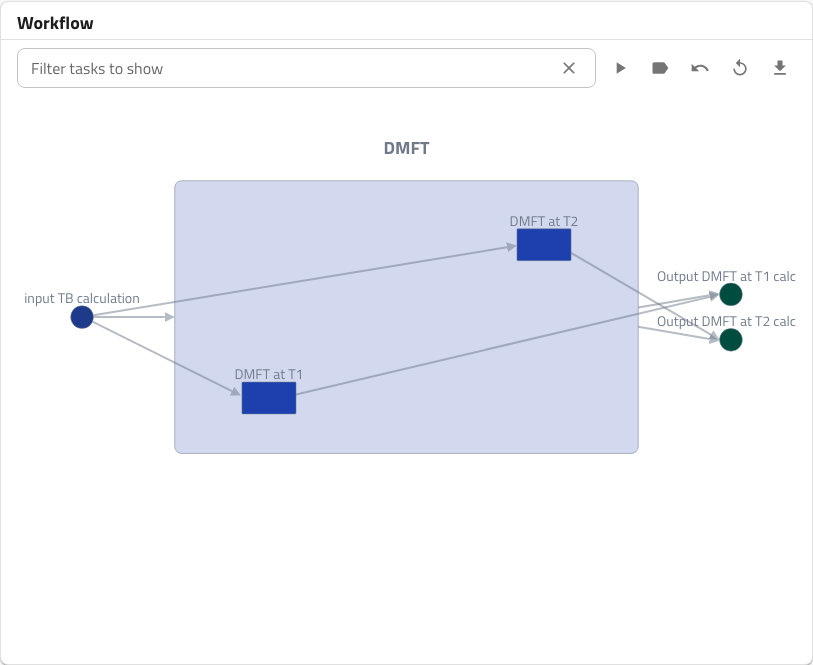
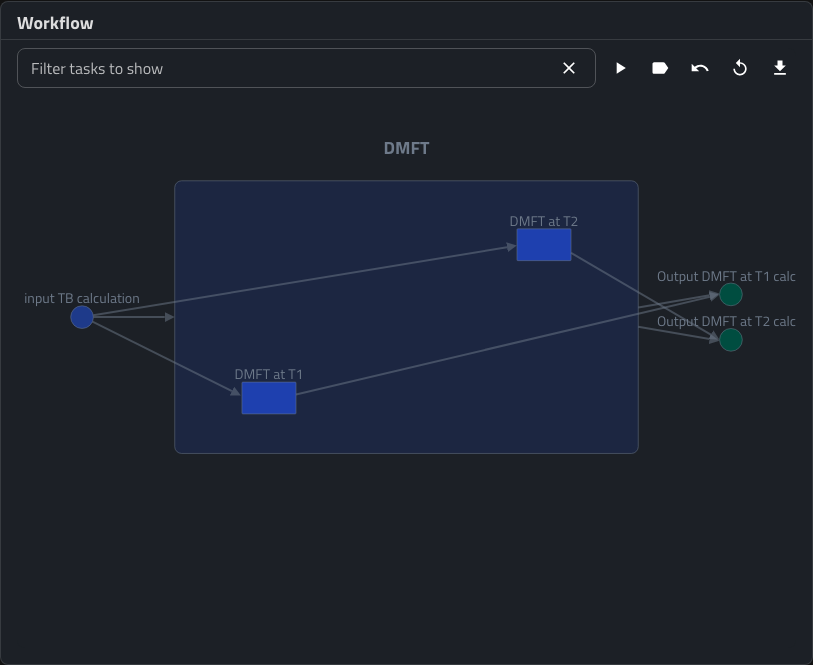
Select the DMFT task to enter the sub-workflow. The graph then shows the
DMFT at T1 and DMFT at T2 tasks. Both receive the TB calculation as input,
and each connects to its corresponding DMFT output. Use the back arrow in the
workflow toolbar to return to the parent graph.
To reproduce this example, download the compressed bundle and add it while creating a project. The workflow YAML is located at the root of the bundle.
Download nested_workflow_one-entry.zip
Workflows with custom tasks
A custom task is a task whose raw files NOMAD does not automatically recognize, or a task that has no associated raw files. The task must still be represented by an entry before a workflow can reference it. One option is to create that entry from a built-in or custom Electronic Lab Notebook (ELN) schema.
Related pages: Start working with schemas.
Represent files with ElnFileManager
ElnFileManager is a built-in schema for referencing and annotating files in an
ELN entry. To instantiate this schema from YAML, set data.m_def to its full
section-definition path. See
How-to guides > ... > Populate data
for the general purpose and syntax of m_def.
For example, the following file defines an entry that describes the creation of a force-field file:
create_force_field.archive.yaml
data:
  m_def: 'nomad.datamodel.metainfo.eln.ElnFileManager'
  name: 'Create force field'
  description: 'The force field is defined for input to the MD simulation engine.'
  Files:
  - file: 'Custom_ELN_Entries/water.top'
    description: 'The force field file for simulation input.'
The file value identifies the path to water.top from the project root. In
this example, the file must therefore be stored at
Custom_ELN_Entries/water.top for NOMAD to resolve the reference during
processing.
Example workflow with ELN tasks
For a concrete example, consider a workflow consisting of three tasks for setting up a molecular dynamics (MD) simulation. Each task receives parameters or an execution script and produces a file.
Use ElnFileManager to create entries for each task and the execution scripts.
The workflow parameters use the more general ElnBaseSection schema:
create_force_field.archive.yaml
create_box.archive.yaml
insert_water.archive.yaml
workflow_parameters.archive.yaml
workflow_scripts.archive.yaml
data:
  m_def: 'nomad.datamodel.metainfo.eln.ElnFileManager'
  name: 'Workflow Scripts'
  description: 'All the scripts run during setup of the MD simulation.'
  Files:
  - file: 'Custom_ELN_Entries/workflow_script_1.py'
    description: 'Creates the simulation box and inserts water molecules.'
  - file: 'Custom_ELN_Entries/workflow_script_2.py'
    description: 'Creates the appropriate force field files for the simulation engine.'
Define the workflow in setup_workflow.archive.yaml using the entries shown
above:
setup_workflow.archive.yaml
workflow2:
  name: 'MD Setup workflow'
  inputs:
  - name: 'workflow parameters'
    section: '../upload/archive/mainfile/Custom_ELN_Entries/workflow_parameters.archive.yaml#/data'
  - name: 'workflow scripts'
    section: '../upload/archive/mainfile/Custom_ELN_Entries/workflow_scripts.archive.yaml#/data/Files'
  outputs:
  - name: 'structure file'
    section: '../upload/archive/mainfile/Custom_ELN_Entries/insert_water.archive.yaml#/data/Files/0/file'
  - name: 'force field file'
    section: '../upload/archive/mainfile/Custom_ELN_Entries/create_force_field.archive.yaml#/data/Files/0/file'
  tasks:
  - m_def: 'nomad.datamodel.metainfo.workflow.TaskReference'
    name: 'create box'
    task: '../upload/archive/mainfile/Custom_ELN_Entries/create_box.archive.yaml#/data'
    inputs:
    - name: 'workflow parameters'
      section: '../upload/archive/mainfile/Custom_ELN_Entries/workflow_parameters.archive.yaml#/data'
    - name: 'workflow script 1'
      section: '../upload/archive/mainfile/Custom_ELN_Entries/workflow_scripts.archive.yaml#/data/Files/0/file'
    outputs:
    - name: 'initial box'
      section: '../upload/archive/mainfile/Custom_ELN_Entries/create_box.archive.yaml#/data/Files/0/file'
  - m_def: 'nomad.datamodel.metainfo.workflow.TaskReference'
    name: 'insert water'
    task: '../upload/archive/mainfile/Custom_ELN_Entries/insert_water.archive.yaml#/data'
    inputs:
    - name: 'initial box'
      section: '../upload/archive/mainfile/Custom_ELN_Entries/create_box.archive.yaml#/data/Files/0/file'
    - name: 'workflow script 1'
      section: '../upload/archive/mainfile/Custom_ELN_Entries/workflow_scripts.archive.yaml#/data/Files/0/file'
    outputs:
    - name: 'structure file'
      section: '../upload/archive/mainfile/Custom_ELN_Entries/insert_water.archive.yaml#/data/Files/0/file'
  - m_def: 'nomad.datamodel.metainfo.workflow.TaskReference'
    name: 'create force field'
    task: '../upload/archive/mainfile/Custom_ELN_Entries/create_force_field.archive.yaml#/data'
    inputs:
    - name: 'workflow parameters'
      section: '../upload/archive/mainfile/Custom_ELN_Entries/workflow_parameters.archive.yaml#/data'
    - name: 'workflow script 2'
      section: '../upload/archive/mainfile/Custom_ELN_Entries/workflow_scripts.archive.yaml#/data/Files/1/file'
    outputs:
    - name: 'force field file'
      section: '../upload/archive/mainfile/Custom_ELN_Entries/create_force_field.archive.yaml#/data/Files/0/file'
After processing, the workflow entry contains the following graph:
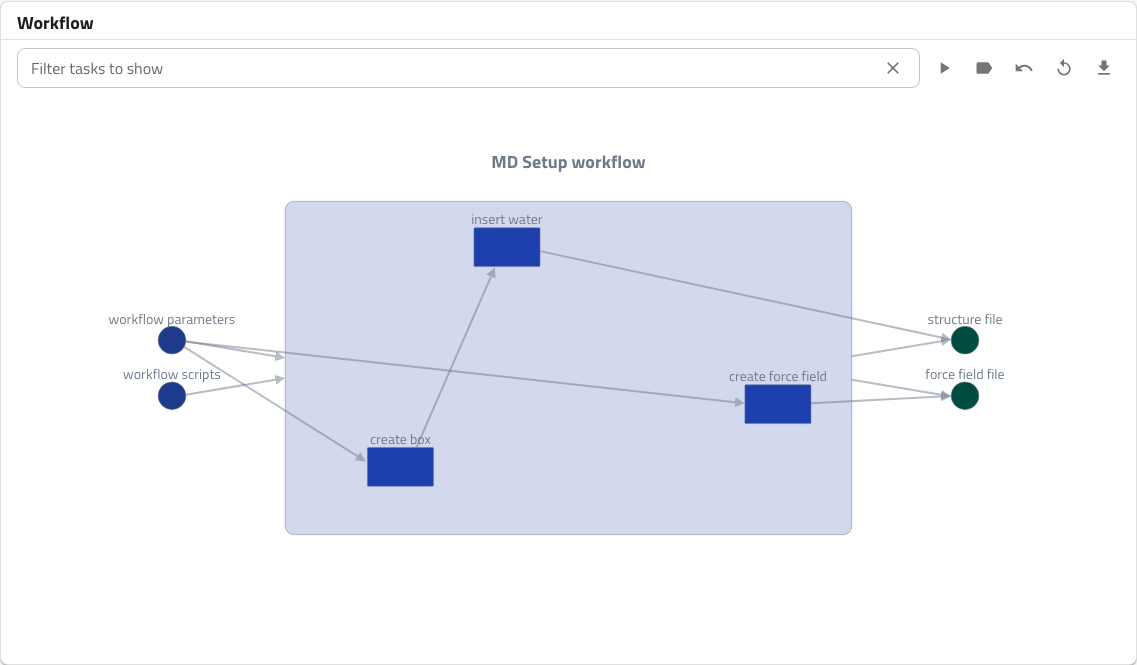
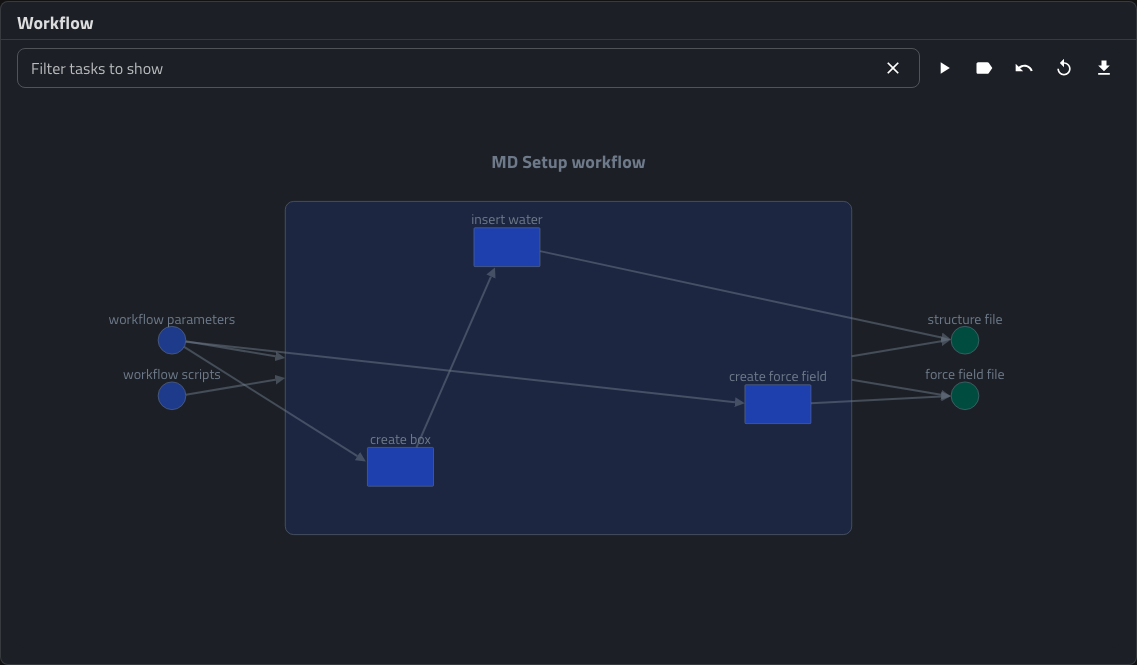
To reproduce the example, download the bundle and add it to a project. It contains the referenced files, the entry YAML files, and the workflow YAML shown above.
Download Custom_ELN_Entries.zip
Create an experimental workflow with an ELN
To build an experimental workflow by linking process and measurement entries with the built-in Experiment ELN schema, follow Tutorials > ... > Integrate your experiment.
Using the workflow visualizer
When an entry contains a workflow2 section, its CONNECTIVITY page shows
an interactive workflow graph. Depending on the entry layout, a Workflow
card may also appear on OVERVIEW. In addition to the graph,
CONNECTIVITY lists entries referenced by or referencing the current entry,
as well as activity references.
The visualizer supports the following actions:
- Inspect the workflow structure: Inputs, tasks, and outputs are arranged from left to right. Arrows show their connections, and hovering over graph elements highlights them or reveals their full labels.
- Navigate nested workflows: Select a task node to open its workflow layer. Use the back control or select the current workflow node to return to the previous layer.
- Open referenced data: Select the label of an input, task, or output to open the referenced entry or archive section. Use the browser's back button to return to the workflow entry.
- Focus on a connection: Select an arrow between tasks to show the connected tasks and their shared input and output context.
- Filter tasks: Use the Filter tasks to show bar to limit the tasks
displayed in a large graph. Enter zero-based indices and press Enter to apply
the filter. For example,
0selects the first task,0,2,4selects individual tasks,0:5selects the first five tasks,:50%selects the first half, and-5:selects the last five tasks. - Adjust or export the view: Enable the force-directed layout, show or hide the legend, reset the graph, or download it as an SVG file.
Advanced Topics
Extending the workflow schema
The abstract workflow schema supports general tools such as workflow searches, navigation, and graph visualization. You can extend it with specialized references, workflow or task parameters, and other workflow-specific metadata. The distinction between these general and specialized schemas is described in Explanation > Workflows > Custom and standardized workflows.
The following example defines a specialized GeometryOptimizationWorkflow
with a convergence threshold and a reference to the final calculation:
definitions:
  sections:
    GeometryOptimizationWorkflow:
      base_section: nomad.datamodel.metainfo.workflow.Workflow
      quantities:
        threshold:
          type: float
          unit: eV
        final_calculation:
          type: runschema.calculation.Calculation

workflow2:
  m_def: GeometryOptimizationWorkflow
  final_calculation: '#/run/0/calculation/-1'
  threshold: 0.029
  name: GeometryOpt
  inputs:
    ...
For the general schema inheritance syntax, see How-to guides > ... > Inherit from a base section.